In my previous post, we have seen how to create and deploy an app to developer site.
Now i want to use that app in any SharePoint site. This is really interesting because ultimately we have to use apps anywhere in our SharePoint site. In starting stage, I have struggled very hard to find solution for how to add an app to my site and how to show that app in my SharePoint pages and finally got it.
Below are the steps which i have followed.
1. Take out app which is in solution's bin folder and keep it anywhere or else you can keep it in same place.
path is looks like <solution path>/bin/Debug/app.publish/<version number>/<appname>.app
2. I have create new web application and one root collection. Now i want to use the existing app in newly created site.


If you want to use any app in your web application then there should be on app catalog for the web application and app should be added to the app catalog then only the app will be available to all site collections/sites under the web application.
So, now we need to specify where we should upload/add our app.
All apps are to be upload to app catalog only.
For this we can create new app catalog or we can use existing app catalog to the newly create web application.
For now am going to create new app catalog for the newly created web application.
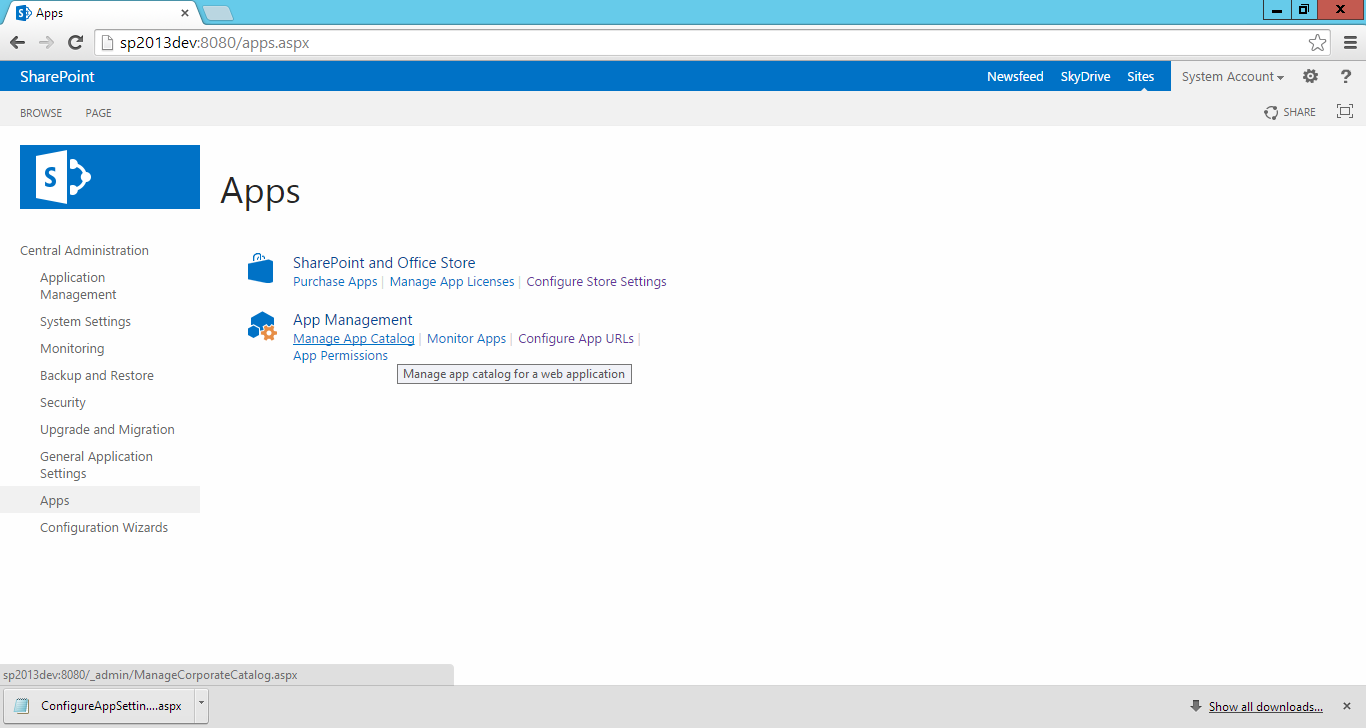
3. Go to Apps in Central administration --> Click on Manage App Catalog.


4. Choose correct web application from web application list and select "Create a new app catalog site" then click OK.

5. Then it will open create app catalog page, in this specify the below details
Title - Title for catalog site
Description - Description for catalog site
Web Site Address - Specify URL name
Specify primary site collection administrator name then
Specify list of end users names

6. After successfully creation of app catalog site it will redirect to manage app catalog page.
Here click view setting --> it will redirect to site setting then click site collection administrators.

Now add user name to whom you want to add as site collection administrators.

7. Now go to app catalog site home page, there you can see the below options
Apps for SharePoint
Apps for Office
App Requests
Click on Apps for SharePoint.

8. Click "New App" and then upload your app file (.app).


9. Once the app successfully uploaded, we need to add few details about app then click OK.

10. After successfully adding app to the list, it will looks as below screen.

11. Now you go to site contents --> click add an app.

12. It will open apps page and will show all OOB apps in SharePoint and on left hand side you can find the below two options under your apps.
Apps you can add (default selected)
From your organization

13. Click on "From your organization" then you can see list of apps available where have been uploaded in app catalog.

14. Select your app by click on app, once you selected any app it will pop up once window asking about trusting the app. Click on "Trust it" then it will create new app in your SharePoint site.


15. Now create a page or open existing page to add newly created app.Here i have created new page named as "GetListDetailsApp.aspx"

16. Open the page in edit mode and click on "App part" on ribbon. it will show all apps in the current SharePoint site. select your app and click OK.

17. Now save the page and it will looks as below.

18. As i told in the starting my app will show list of available list/libraries in the current site.
if you click on get details button, it will show all available list and libraries.

Now i want to use that app in any SharePoint site. This is really interesting because ultimately we have to use apps anywhere in our SharePoint site. In starting stage, I have struggled very hard to find solution for how to add an app to my site and how to show that app in my SharePoint pages and finally got it.
Below are the steps which i have followed.
1. Take out app which is in solution's bin folder and keep it anywhere or else you can keep it in same place.
path is looks like <solution path>/bin/Debug/app.publish/<version number>/<appname>.app
2. I have create new web application and one root collection. Now i want to use the existing app in newly created site.
If you want to use any app in your web application then there should be on app catalog for the web application and app should be added to the app catalog then only the app will be available to all site collections/sites under the web application.
So, now we need to specify where we should upload/add our app.
All apps are to be upload to app catalog only.
For this we can create new app catalog or we can use existing app catalog to the newly create web application.
For now am going to create new app catalog for the newly created web application.
3. Go to Apps in Central administration --> Click on Manage App Catalog.
4. Choose correct web application from web application list and select "Create a new app catalog site" then click OK.
5. Then it will open create app catalog page, in this specify the below details
Title - Title for catalog site
Description - Description for catalog site
Web Site Address - Specify URL name
Specify primary site collection administrator name then
Specify list of end users names
6. After successfully creation of app catalog site it will redirect to manage app catalog page.
Here click view setting --> it will redirect to site setting then click site collection administrators.
Now add user name to whom you want to add as site collection administrators.
7. Now go to app catalog site home page, there you can see the below options
Apps for SharePoint
Apps for Office
App Requests
Click on Apps for SharePoint.
8. Click "New App" and then upload your app file (.app).
9. Once the app successfully uploaded, we need to add few details about app then click OK.
10. After successfully adding app to the list, it will looks as below screen.
11. Now you go to site contents --> click add an app.
12. It will open apps page and will show all OOB apps in SharePoint and on left hand side you can find the below two options under your apps.
Apps you can add (default selected)
From your organization
13. Click on "From your organization" then you can see list of apps available where have been uploaded in app catalog.
14. Select your app by click on app, once you selected any app it will pop up once window asking about trusting the app. Click on "Trust it" then it will create new app in your SharePoint site.
15. Now create a page or open existing page to add newly created app.Here i have created new page named as "GetListDetailsApp.aspx"
17. Now save the page and it will looks as below.
18. As i told in the starting my app will show list of available list/libraries in the current site.
if you click on get details button, it will show all available list and libraries.